


How to Build a Noteworthy Cheese Board
There is cheese in your future

I love cheese boards. They are beautiful, tasty, and full of surprises - a bit like a Hidden Objects puzzle. The more you nose around, the more interesting things you discover. They can play the role of the showstopping centerpiece at a party and still be casual enough for dinner on a random Sunday evening. Everybody loves them. Too few people build them. It’s time to join the party.
I understand that the amazing cheese boards that you see on Pinterest and Instagram are truly works of art that seem ridiculously difficult to reproduce, but building a beautiful cheese board is easier than you think. I’m here to help. Let’s get into it.
Your cheese board needs a base
Let’s start at the beginning. We will need something to put all of that cheese on. If you’ve got a real deal cheese board, go ahead and use it, and if not, there are options. A cutting board, a pizza peel, a couple of plates, even a wood plank, a piece of tile, or a chunk of slate would all be workable bases for your cheese board. Use what you’ve got or repurpose something interesting.
All about the cheese
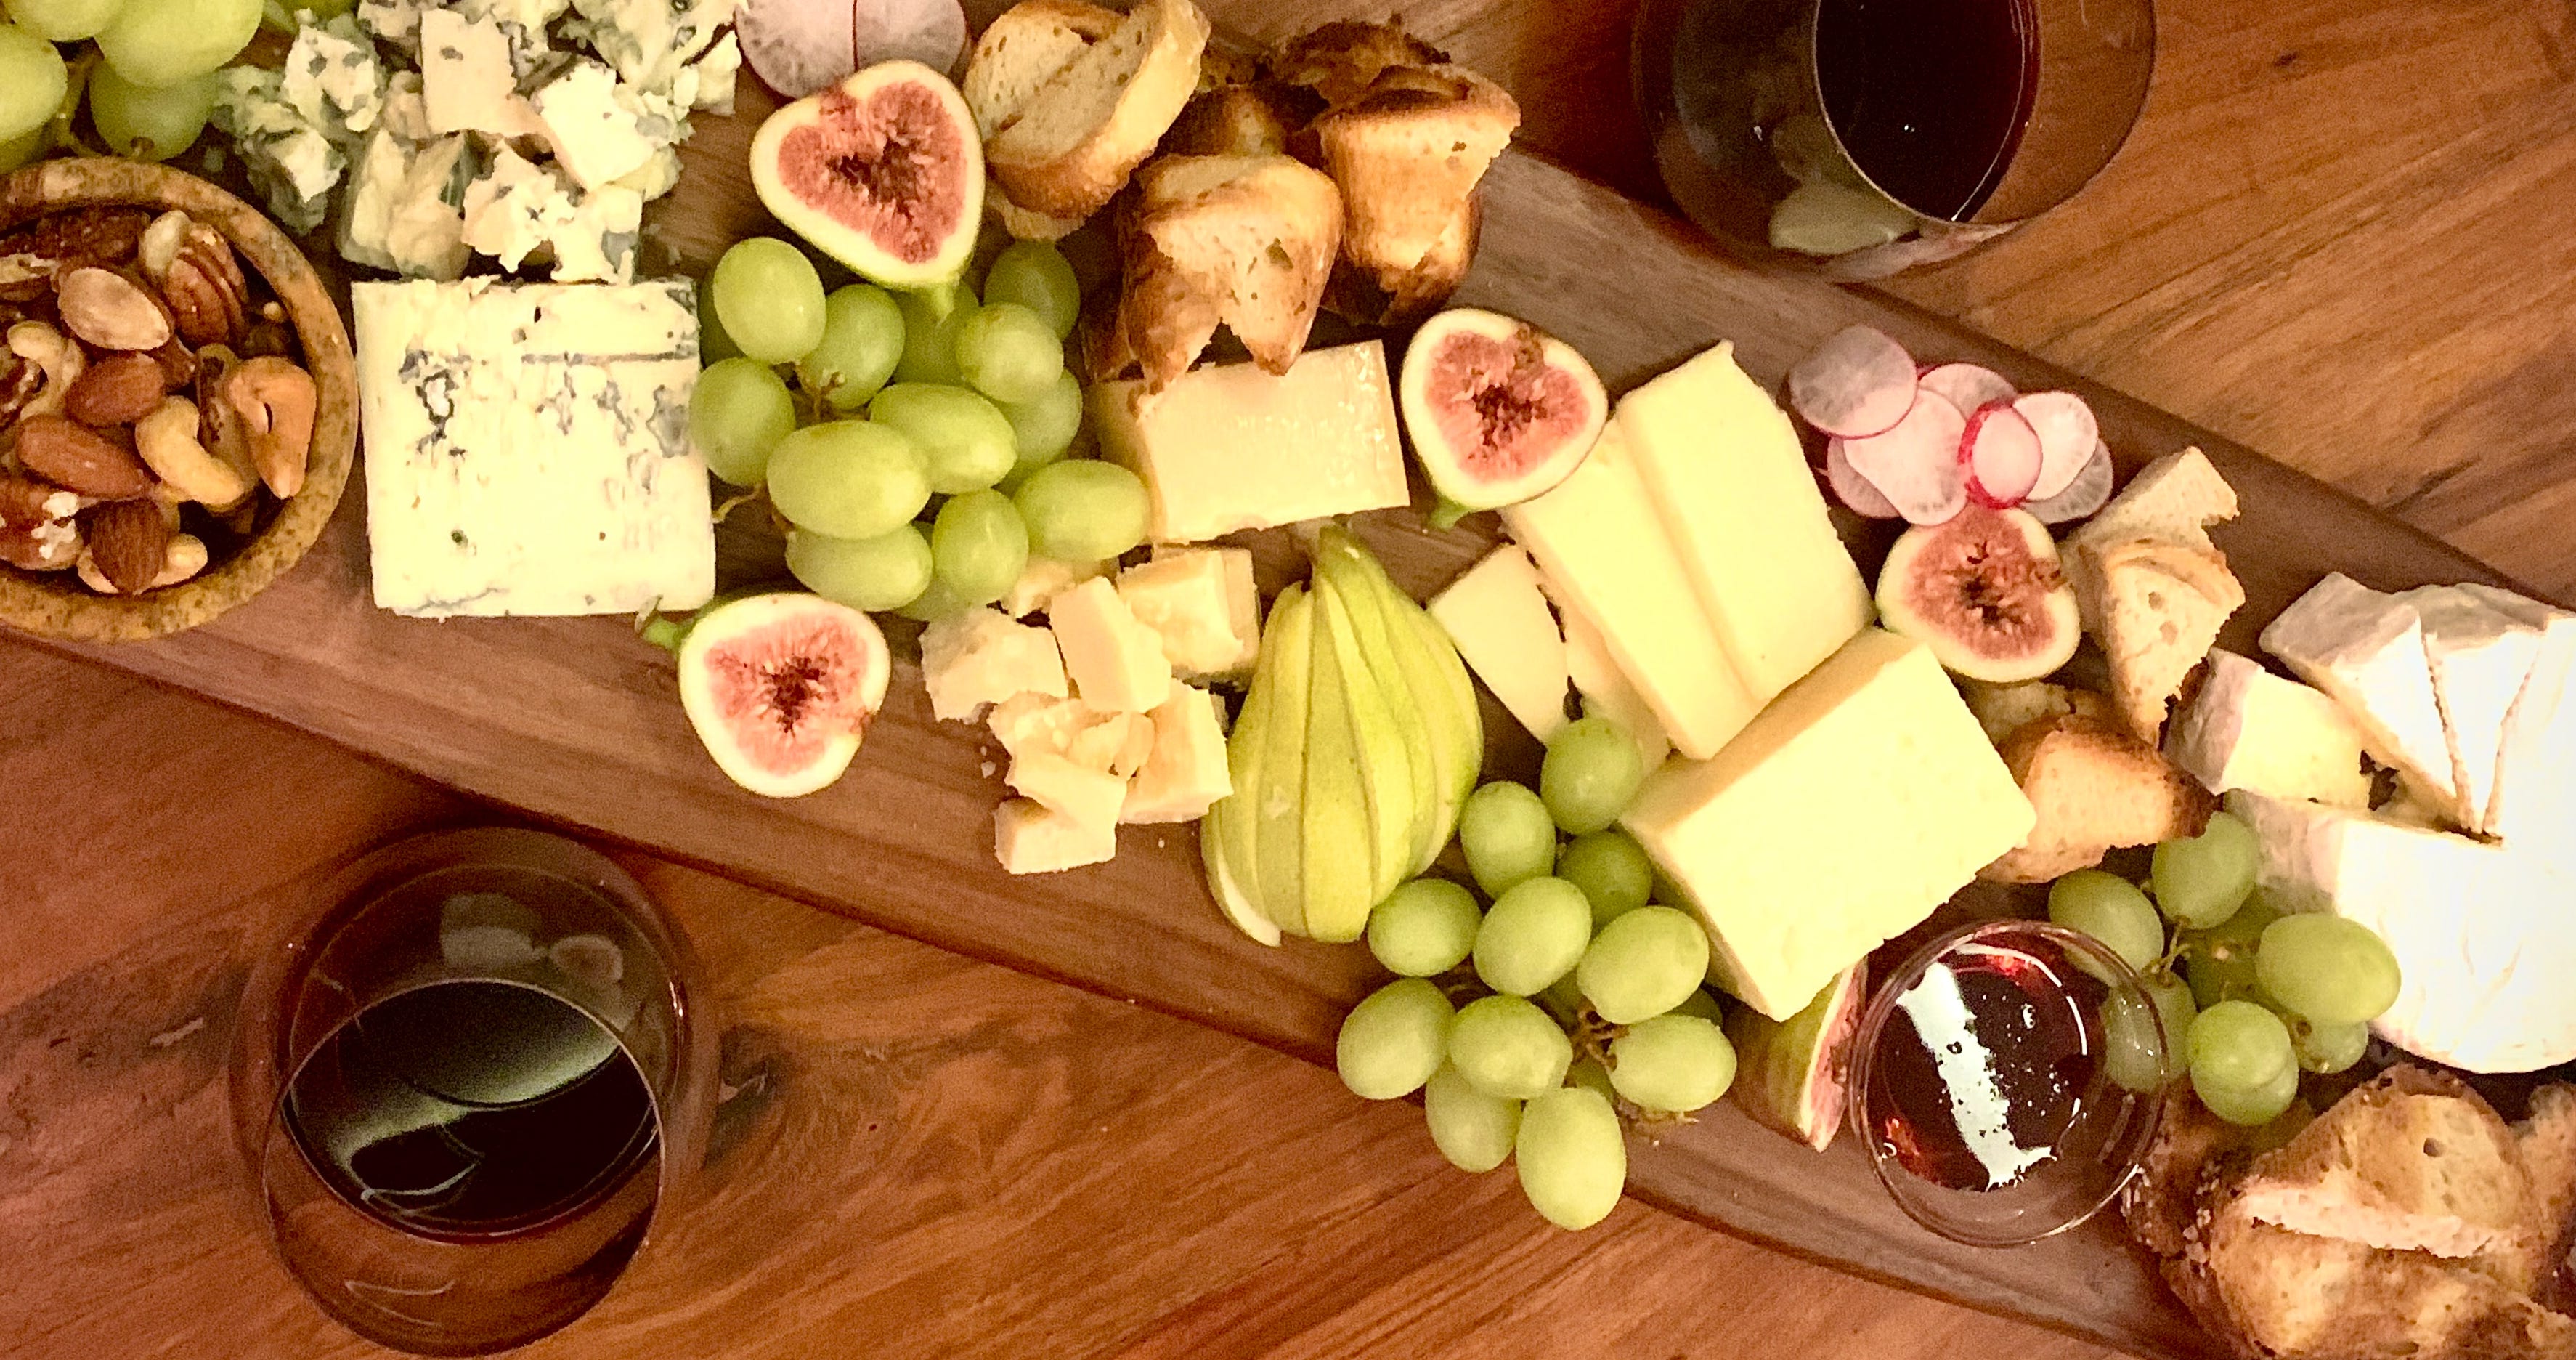
There are a few cheese “rules” for building a cheese board.
Cheese board rule #1
Choose 3-4 different kinds of cheese, with a good mix of textures and flavors.
A soft cheese - like goat cheese, camembert, or brie.
A semi-soft cheese - like gouda, fontina, or cheddar.
A hard cheese - like Grana Padano, Parm Reggiano, or an aged Gouda.
A blue cheese like gorgonzola or Stilton, or a really distinctive cheese like taleggio is a good option for a fourth cheese.
If you’d like to try some new flavors and discover your next favorite cheese, a visit to a cheesemonger (the name of someone who specializes in cheese) might be in order. They will let you taste everything there and can help you select cheeses that play well together.
Cheese board rule #2
Before you build your board, cut some of each of the cheeses. Don’t cut it all up, just a few pieces to show people what to do. Nobody wants to be the first one to cut into a round of cheese.
Cheese should be cut in the shape that it is. Think triangles, slices, and crumbles
Triangles - round rindy cheeses like brie and camembert.
Slices - any cheese that comes in a rectangle like fontina, Gruyere, most cheddars, and wedges of Gouda and Edam.
Crumbles - hard cheeses that flake easily like Parm Reggiano and aged cheddars and Goudas. Most blue cheese should be crumbled, too.
If your cheese came with a rind, don’t cut it off. Rind-y cheeses are a whole flavor experience, one that needs both the rind and the soft paste inside to enjoy.
Cheese board rule #3
Think about what else you’d like to add. Although the cheese is the star of the show, you need some supporting characters.
Nuts - one kind or a mix
Olives - preferably without pits
Bread - fresh or toasted and cut into triangles or thin pieces
Crackers - a couple of shapes and flavors will add interest to your board
Cured meats - thin slices of prosciutto, salami, or cured sausages. Roll or fold the slices
Fresh fruit - grapes, strawberries, pears, apples, or figs. Slice, core, and seed if needed
Dried fruit - Craisins, apricots, figs, dates (also without pits)
Something sweet - honey or jam with a small serving spoon
Maybe a pop of color - a spring of rosemary, dill, or Italian parsley
Put things like nuts and olives in bowls or ramekins (or not) to keep them contained.
Build the board
Start with the cheese.
Put the cheese - cut and whole pieces together on the board.
Place them in order of flavor from mildest to boldest. That’s how we want people to enjoy them.
Fan out the sliced pieces and make a small pile of the crumbles.
Pull a cut triangle or two out of the rounds.
Put really soft cheese into a small bowl so it doesn’t ooze all over the board.
Add the small bowls of nuts, olives, and honey randomly around the board.
Add the bread and crackers. Put some next to each kind of cheese.
Tuck the fruit and garnishes around the board to fill in the holes.
Stand back and admire your work. Then get ready for the compliments.