

Toasted Basque Cheesecake
This show-stopping wonder is the queen of all cheesecakes


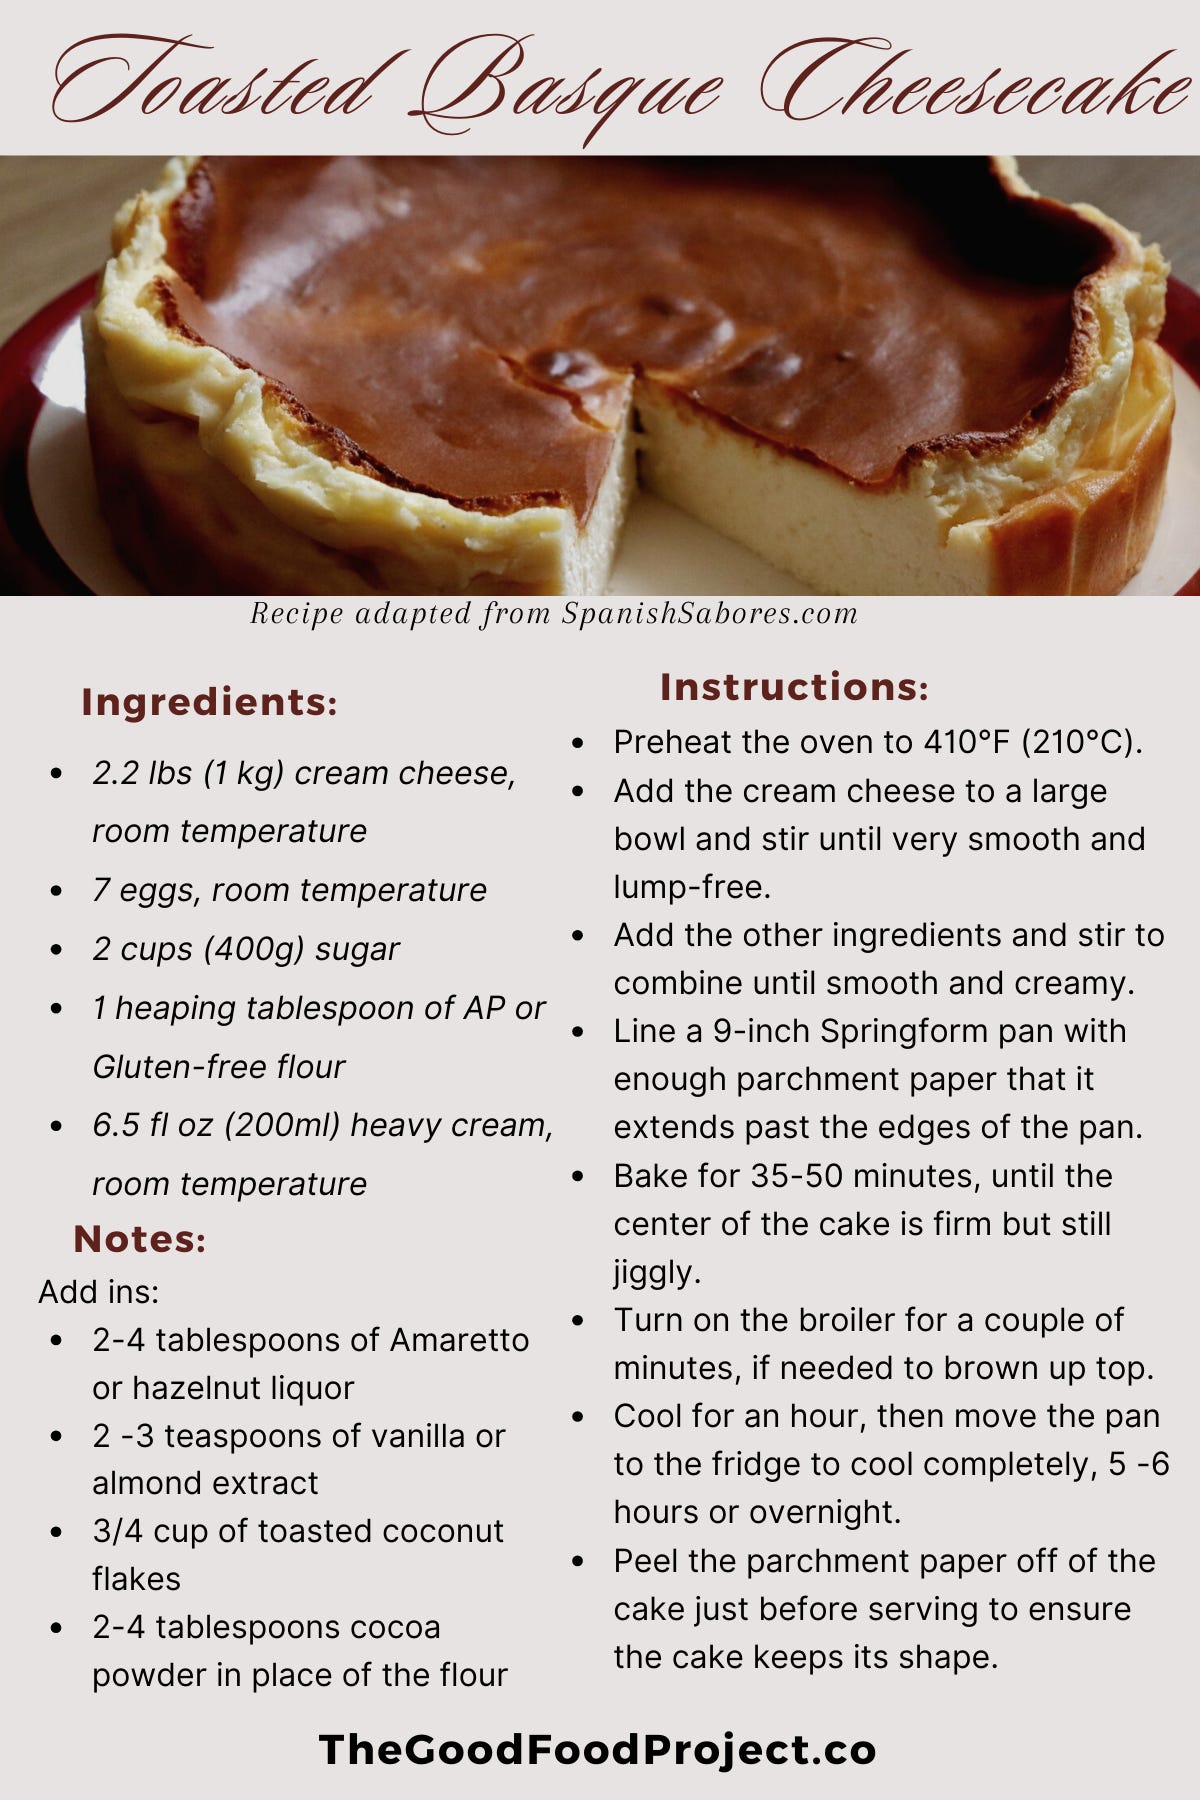
Baked without a crust and wrapped in parchment paper, Burnt Basque Cheesecake has a caramelized, not-to-sweet flavor, and a soft, airy texture wholly unlike a dense, compact New York-style cheesecake.
Created by the pastry chef of La Vina, a cozy restaurant in San Sebastian, Spain, this unusual and delicious Burnt Basque Cheesecake has developed a loyal and passionate worldwide following.
The first time I made this marvel of a cheesecake, it was for my book club, a brilliant group of readers and food lovers. As I introduced the Burnt Basque Cheesecake, my wonderful friends, thinking that I was confessing to an oven mishap, assured me that it would taste just fine and we’d simply eat around the burnt part.
This happened again last week. I announced I was bringing Burnt Basque Cheesecake to a Christmas Eve gathering. My friends were excited about the cheesecake but quite concerned that I was intentionally planning to burn it.
I agree that “Burnt” isn’t the best name for this amazing dessert, so I’ve decided to call it “Toasted” from now on. It’s a descriptor with a bit less baggage and is more indicative of the cake’s complex caramel and vanilla flavors.
Toasted Basque Cheesecake is the cheesecake that I believe makes all other cheesecakes obsolete.
It comes together quickly with just a few ingredients - cream cheese, heavy cream, eggs, flour, and sugar - and lacks the potential baking land mines of water baths and cracked crusts that plague regular cheesecake. It’s a great recipe for cheesecake bakers, both novice and experienced, to try.
As an intentionally “plain” cake, Toasted Basque Cheesecake is great on its own but truly shines when you add something to make it your own. Vanilla bean, cocoa powder, lemon zest, hazelnut or almond liquor, Bourbon, or coconut would all be fun flavor additions to the batter. Or consider serving each slice with a dollop of whipped cream and fresh berries, or a ribbon of chocolate, caramel, or dulche de leche.
Tips for a Successful Toasted Cheesecake
Start with room-temperature ingredients
Using cream cheese right out of the fridge leads to lumpy batter. Ditto for adding cold ingredients to your room-temperature cream cheese. Give all of your ingredients an hour or two on the counter before you begin.
Can’t wait that long? A short time -30 seconds in the microwave, 10 minutes in a 250 F oven - will get your cream cheese and heavy cream to a workable temperature. Cold eggs can be sped along with 10 minutes in warm water.
Start with the cream cheese and make sure it’s smooth and well blended before you add the other ingredients. If you’ve got any lumps, work them out by pressing them with the spatula or the back of a spoon against the side of the bowl.
What kind of pan do you have?
Toasted Basque Cheesecake is traditionally baked in an 8- or 9-inch Springform pan, but you have options. I’ve made this in 2 6-inch cake pans, a loaf pan, and even made individual cheesecakes in muffin tins. The baking time can vary depending on the size of the pan and the depth of your cheesecake, but the process is the same. Start checking the cake at the recipe’s halfway point and judge from there.
Parchment paper
Parchment paper replaces the need for a crust to hold the cheesecake together. Use one or two large or several smaller sheets and press the paper into the pan as smoothly as possible, ensuring that the paper clears the top of the pan by at least an inch. Your cheesecake will rise a lot in the oven before deflating somewhat as it cools.
Cool and let chill in the fridge
Your cheesecake will be soft and a little jiggly when it comes out of the oven. Let it cool in the pan, then move the pan to the fridge to chill completely, 5 or 6 hours or even overnight. After that, the pan can be removed from the pan using the parchment paper as handles. Peel the parchment paper off and move the cake to a serving plate. Served the cheesecake cold right out of the fridge or bring it to room temperature - it’s great either way.
I hope you’ll give my favorite cheesecake a try and let me know what you thing. I’d love to see a picture of your creation!
With Much Love & Cheesecake -
Chelly